
Hello crochet lovers. Im Helena, from Ahuyama Crochet. I am an environmental engineer a crochet teacher and a mother of two. I love traveling, cooking and hiking and, of course, I love crochet and its beautiful creative power. My channel blog started almost 7 years ago and now is it's a strong community of crochet lovers. I really believe that we can change the world with some yarns and needles. Crochet make people happier and happy people always make a better world!
Today we are going to learn how to crochet this beautiful openwork sweater, step by step. Its got a medium level of difficulty, but nothing is hard when youve got every single step explained in the tutorial! Depending how fast you work, this sweater can take, on average, between 15 to 20 hours to make.
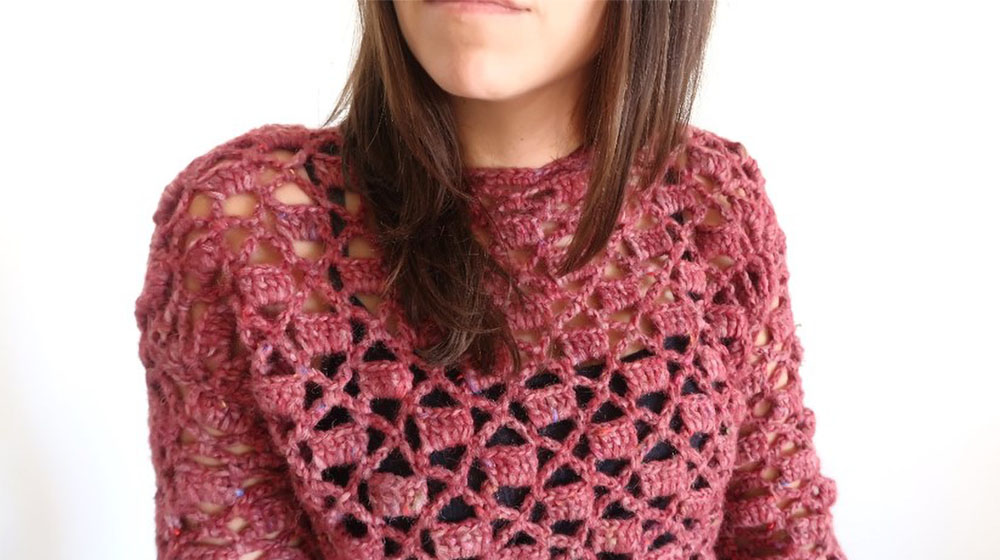

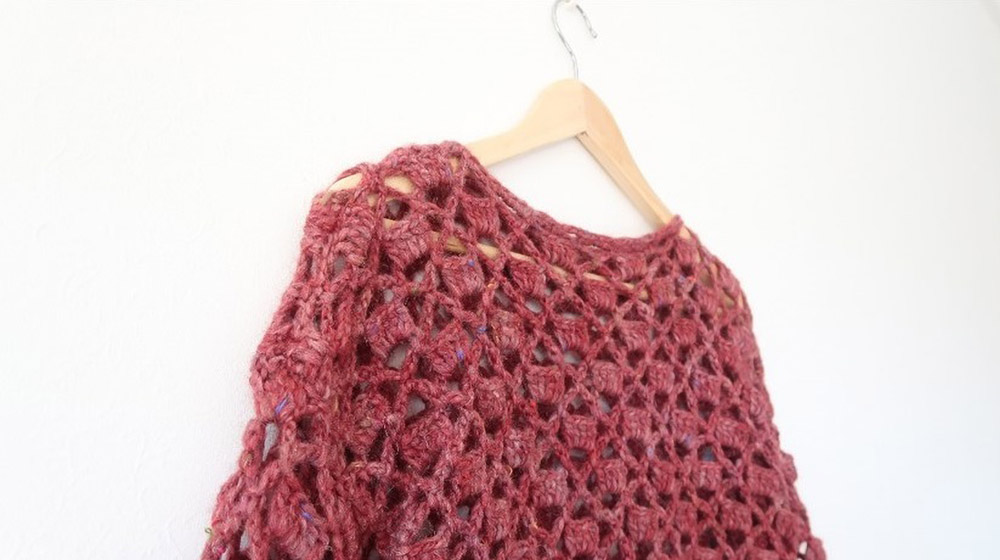
As you can see, we will be using an openwork crochet motif with little flower boxes. This crochet stitch, fast growing and intuitive, will allow us to crochet this sweater in no time and in any size.
Remember that you can visit my YouTube channel to watch the step by step tutorial that will guide you while crocheting this sweater.
Ready to make this gorgeous sweater? Were going to start off with a list of the materials, then move on to the explanation of the abbreviations that youll find in the steps, then finally to the making of the body, the front and last but not least, the back. Before getting to work on the body though, Ill just quickly explain a little about the technique that has been used to make this openwork sweater. After that, all that will be left to do will be to make the sleeves and then sew all the different parts together.
MATERIALS
Cyrcus yarn col Black Cherry 300 g / 10.6 oz for size S and M, 400 g / 14.1 oz for size L and XL
Crochet hook n° 4 EU / G-6 US
Wool needle
CROCHET STITCHES USED
Chain
Single crochet
Double crochet
ABBREVIATION KEY
ch - chain
st - stitch
sc - single crochet (UK double crochet)
dc - double crochet (UK treble)
fpdc - front post double crochet (UK front post treble)
*
* - repeat instructions between asterisks
Lets begin! I will show the instructions for sizes S (M, L, XL)
LEVEL OF DIFFICULTY
Intermediate
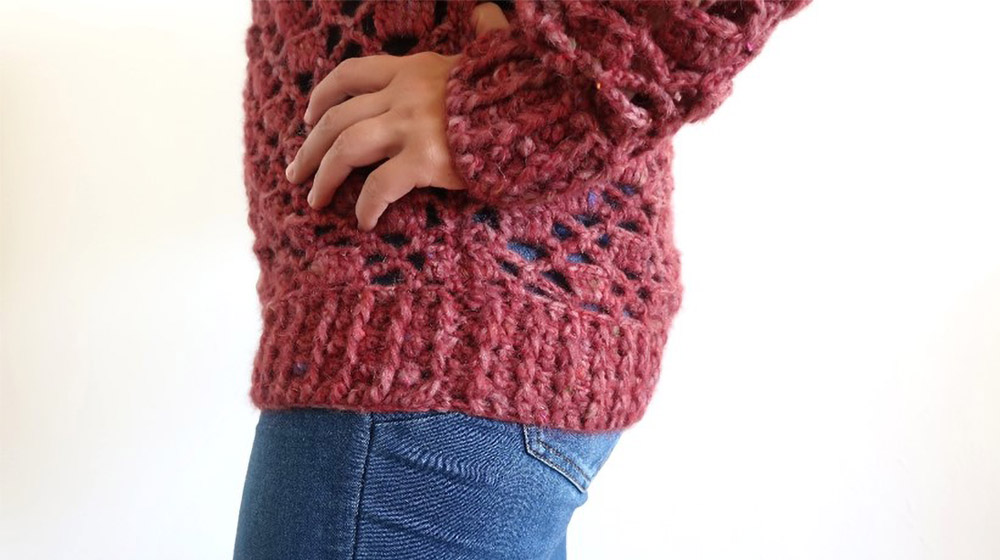
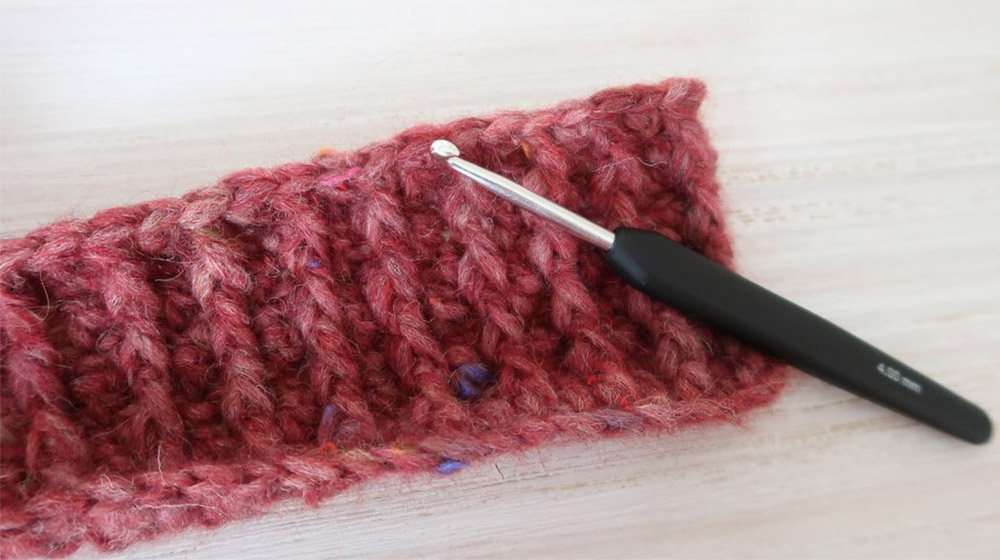
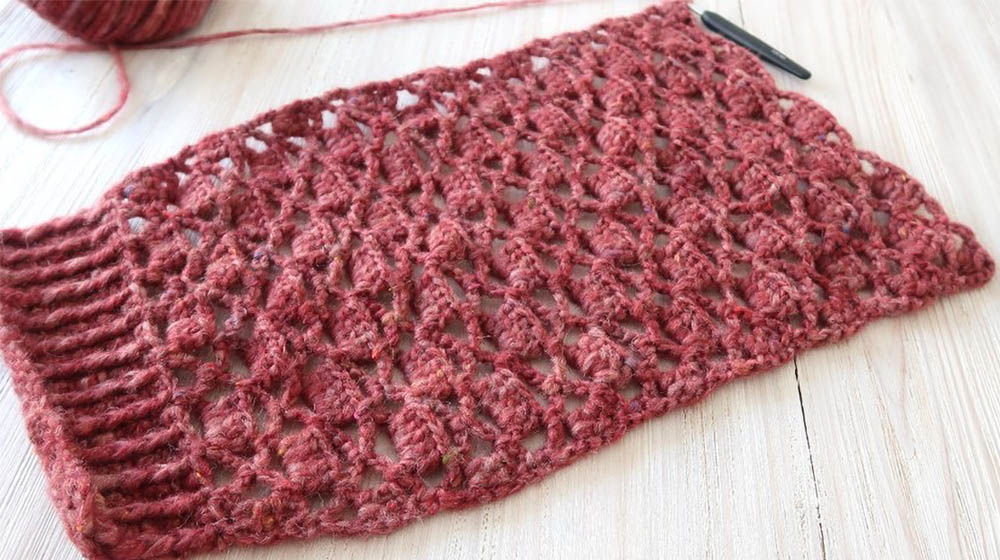
1. Body elastic
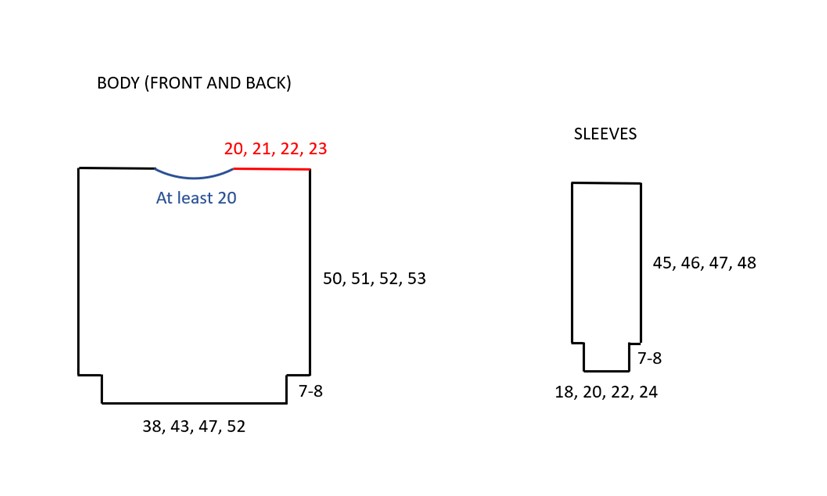
Foundation: ch multiples of 6 + 2 until you get near 38 (43, 47, 52) cm / 15" (16.9", 18.5", 20.5"), 2 extra ch
row 1: 1 dc on third ch from hook, 1 dc on each available ch
row 2: ch 1, turn, 1 sc on each available st
row 3: ch 2, turn, *1 fpdc, 1 dc*
row 4 to X: repeat instructions from row 2 to row 3, until you get near 7 - 8 cm / 2.7" - 3.1"
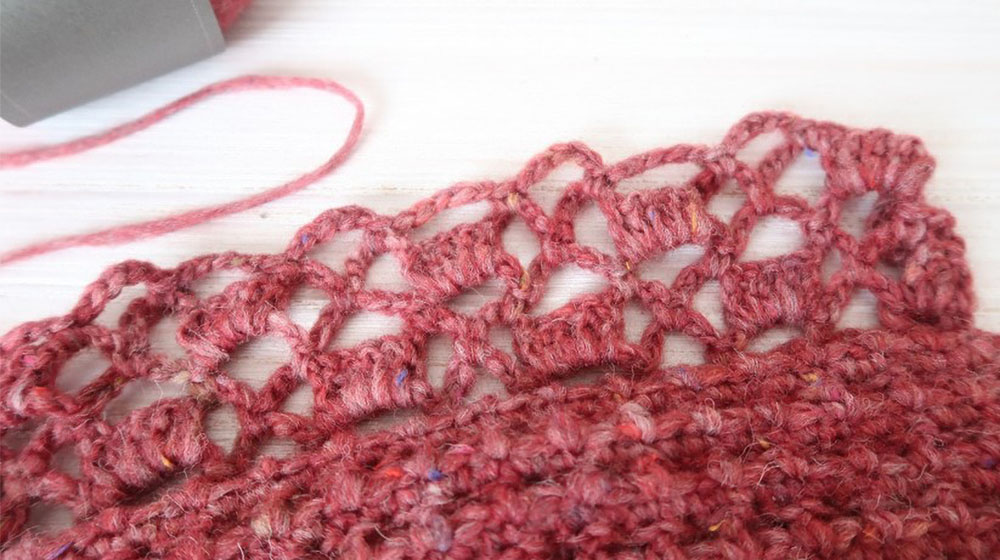
2. Body openwork
Row X+1: ch 1, turn, 1 sc, ch 2, skip 1 st, 1 sc, *ch 5, skip 2 st, 1 sc*, ch 2, skip 1 st, 1 sc
row X+2: ch 3, turn, 2 dc on first chain space, ch 3, 1 sc on next chain space, ch 3, *5 dc on next chain space, ch 3, 1sc on next chain space, ch 3*, 2 dc on last chain space, 1 dc on last st
row X+3: ch 1, turn, 1 sc on first dc, ch 2, 1 sc on next chain space, *ch 5, 1 sc on next chain space*, ch 2, 1 sc on third ch from previous row
row X+4: ch 1, turn, 1 sc on first sc, ch 3, 5 dc on next chain space, *ch 3, 1 sc on next chain space, ch 3, 5 dc on next chain space*, ch 3, 1sc on last st
row X+5: ch 5, turn, 1 sc on first chain space, *ch 5, 1 sc on next chain space*, ch 2, 1 dc on last st
row X to Y: repeat instructions from row X+2 to row X+5, until you get near 50 (51, 52, 53) cm / 19.7" (20.1", 20.5", 20.9"), from the elastic. End in a row type row X+3.
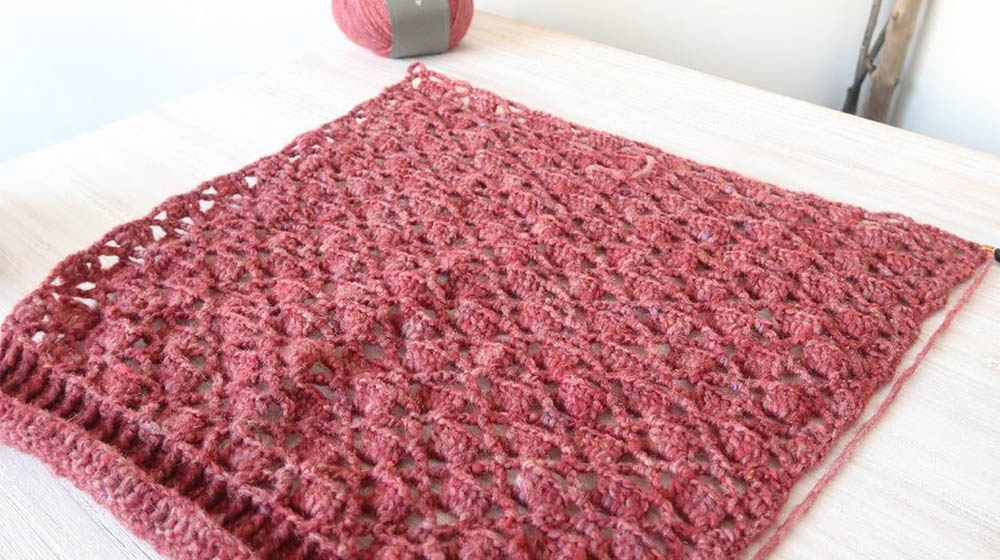
Now mark 20 (21, 22, 23) cm / 7.8" (8.3", 8.7", 9.1") from each upper corner to the center, this will represent each shoulder, leaving a central space for the neckline. Ensure the neckline measures at least 20 cm / 7.8", otherwise your head won't pass through!
LAST Row: Work with the instructions of row X+4, BUT between markers work 5 sc instead of 5 dc

1. Sleeve elastic
Foundation: ch multiples of 6 + 2 until you get near 18 (20, 22, 24) cm / 7.1" (7.8" 8.7",9.4"), 2 extra ch
row 1: 1 dc on third ch from hook, 1 dc on each available ch
row 2: ch 1, turn, 1 sc on each available st
row 3: ch 2, turn, *1 fpdc, 1 dc*
row 4 to X: repeat instructions from row 2 to row 3, until you get near 7 - 8 cm / 2.7" - 3.1"
2. Sleeve openwork
Row X+1: ch 1, turn, 1 sc, ch 2, skip 1 st, 1 sc, *ch 5, skip 2 st, 1 sc*, ch 2, skip 1 st, 1 sc
row X+2: ch 3, turn, 2 dc on first chain space, ch 3, 1 sc on next chain space, ch 3, *5 dc on next chain space, ch 3, 1 sc on next chain space, ch 3*, 2 dc on last chain space, 1 dc on last st
row X+3: ch 1, turn, 1 sc on first dc, ch 2, 1 sc on next chain space, *ch 5, 1 sc on next chain space*, ch 2, 1 sc on third ch from previous row
row X+4: ch 1, turn, 1 sc on first sc, ch 3, 5 dc on next chain space, *ch 3, 1 sc on next chain space, ch 3, 5 dc on next chain space*, ch 3, 1 sc on last st
row X+5: ch 5, turn, 1 sc on first chain space, *ch 5, 1 sc on next chain space*, ch 2, 1 dc on last st
row X to Y: repeat instruction from row X+2 to row X+5, until you get near 45 (46, 47, 48) cm / 17.7" (18.1", 18.5", 18.9"), from the elastic. End in a row type row X+2 or row X+4
Now, with a yarn needle, carefully sew the sleeves.
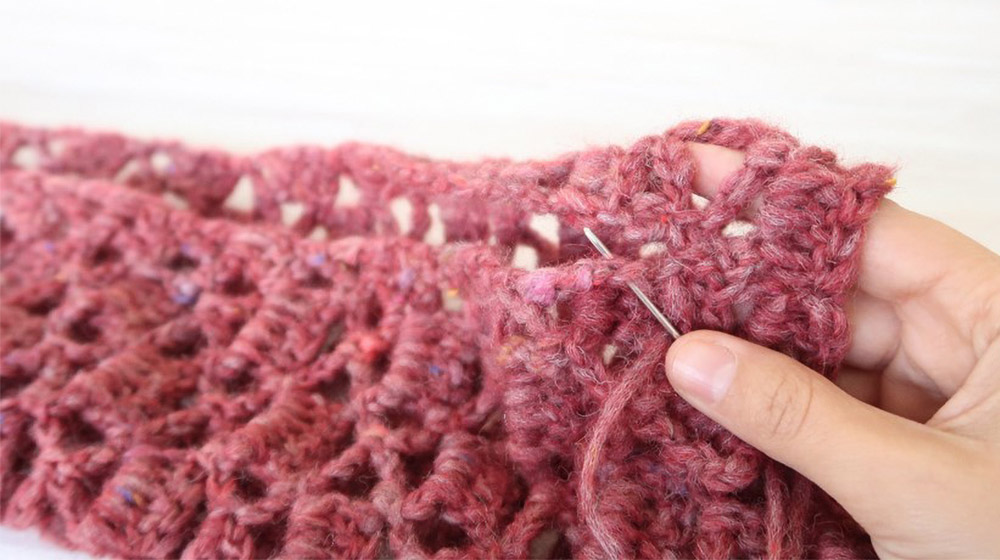
Then attach the sleeves to the body, leaving the correct space for each armhole, at least 18 (19, 20, 21) cm / 7.1" (7.5", 7.9", 8.3").
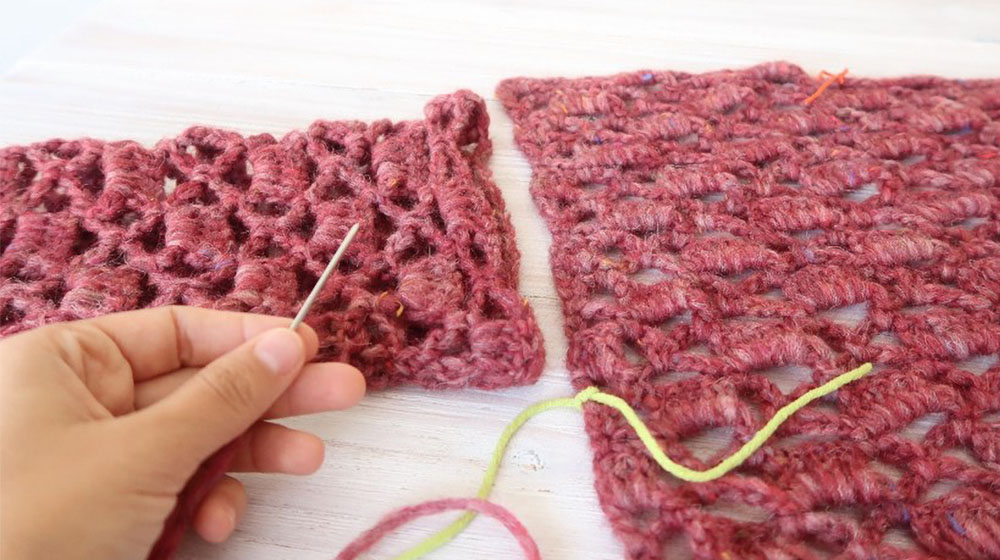
Sew the body sides and the shoulders, following the markers that we used when creating the neckline.
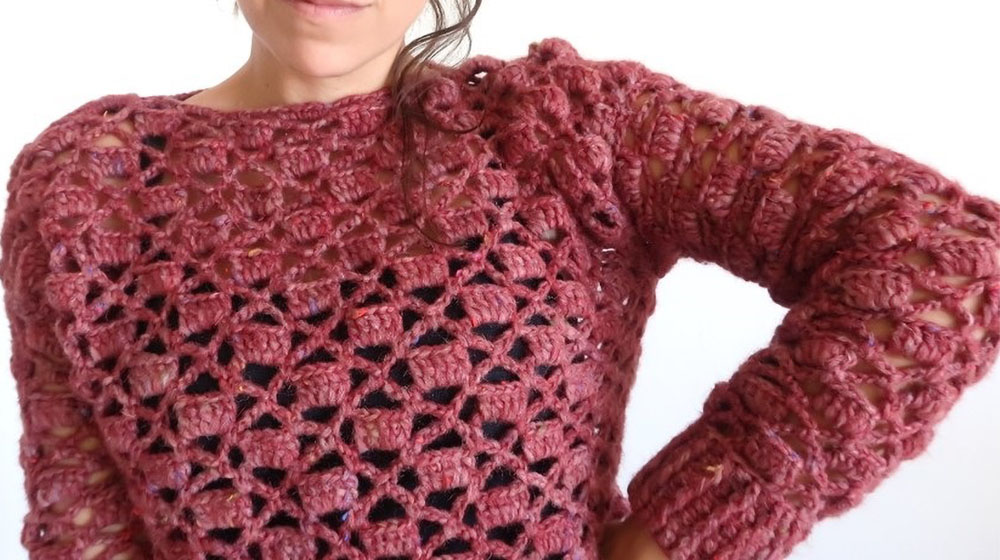
Your openwork sweater is ready! What do you reckon?
Before I go, I'd just like to tell you that, I've made a shell stitch cloak too, using Cyrcus yarn. Make sure you check it out!


WRITE A COMMENT