
This is the third of the super crafty Christmas tutorials and its for a felt basket and one of those spend less (also in terms of time) get more type projects. In fact, youll have a felt basket for panettone, the Italian Christmas cake and customized how you want, in just 5 steps. So quick weve even outdone Flash Gordon!
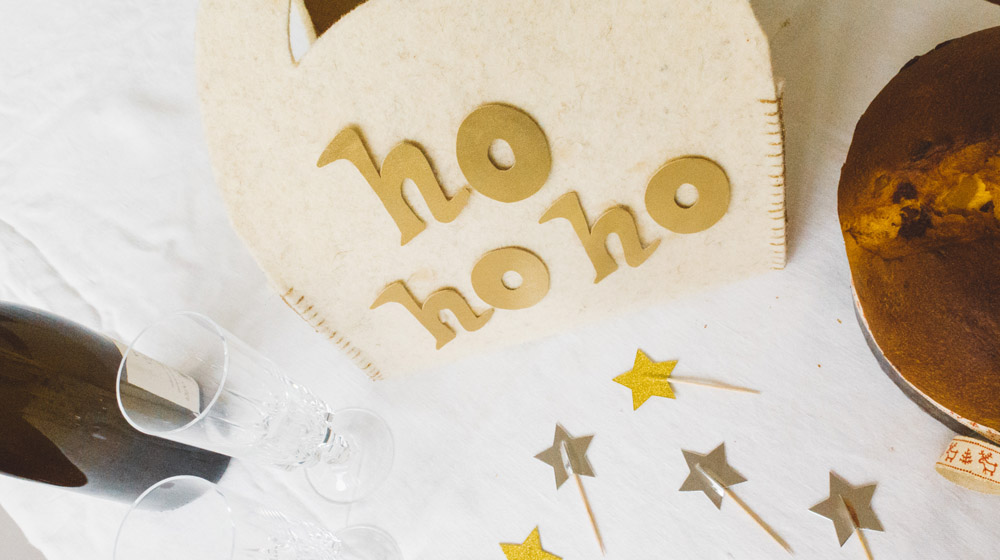
Weve chosen to personalize our felt basket for panettone with one of the most classic Christmas sayings, otherwise known as Santas laugh: "ho ho ho"! There are, however, so many other things you could write, maybe even the name of the lucky person who youre going to give the panettone to!
The base has been made with our Thermoformable Felt in the color Stone and weve used our Deluxe Faux Leather in the color Gold for the letters. Feel free, though, to choose whatever colors you want, from both the Felt and Deluxe Faux Leather collections.
MATERIALS
4 mm thermoformable felt col. Stone 85 x 55 cm / 33.5" x 21.7"
Deluxe faux leather col. Gold 30 x 30 cm / 11.8" x 11.8"
Scissors
Gold sewing thread
Needle
Pencil
Hot glue
An iron
METHOD
Before we begin explaining how to make a felt basket for panettone in 5 steps, we suggest you download the pattern. In doing this you will be able to create your felt basket more effortlessly.
1) Firstly, lay the felt out on a work bench and draw the outline of the square base; each side has to be 24cm.
2) Secondly, outline the 4 sides of the square base, so, the two opposite sides have to have a total length of 13cm and 29cm as shown in the first image within the PDF. Now, cut around the edges of the felt.
3) Thirdly and maybe the most complicated in the whole making of the felt basket for panettone; drawing the handles. Youre going to need a printer, paper and a pencil. Print out the second images in the PDF in normal size and place it on the longer side (29cm). Using a pencil, draw the outline of the felt basket handles. Now, do exactly the same for the opposite side. Lastly, cut out the felt using the scissors.
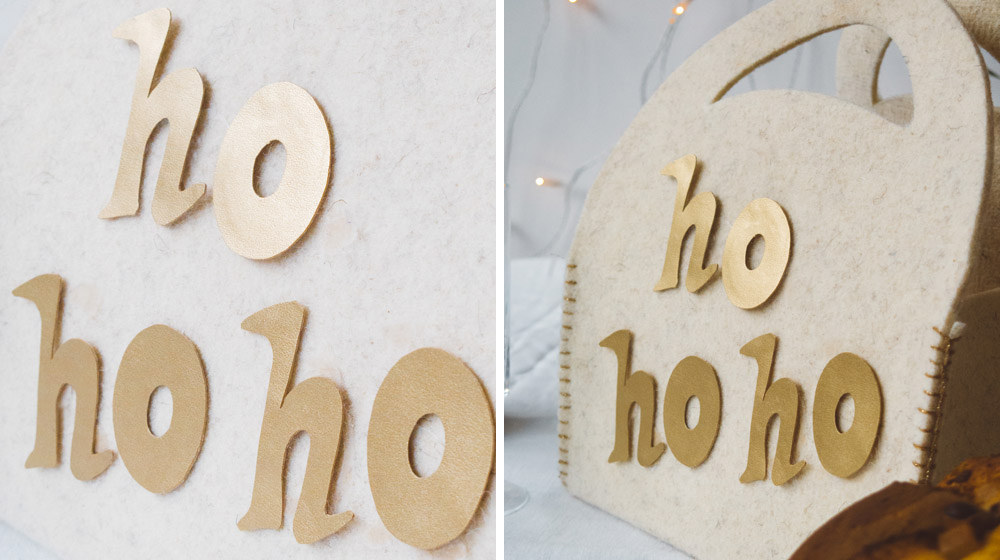
4) At this point all that's left to do is to print the third image of the PDF; in this way the letters will be much easier to do. Take the image below and print it out in normal size. Then taking the faux leather that youve bought, use the image to draw the letters and with much care and attention cut out the templates. Having done that, stick the letters onto the outer side of the felt basket using the hot glue gun. We chose to stick one ho in the middle, under the arch of the handle and the other two under that one to mix it up and draw attention to it.
5) All you have to do now is fold the sides of the base, see the outline on the diagram, using an iron to thermoform the felt. Finally, sew up the 4 sides of the felt basket for panettone, with the needle and thread. We used the buttonhole stitch.
We can now put our mouthwatering Christmas cake in our felt basket, ready to give to someone special. Or if were invited somewhere for dinner, this would definitely be an original cadeau for the host!
Weve really outdone ourselves this super crafty Christmas and apart from having already shown you the amigurumi bears, weve got another surprise in store for you decorations to hang on your tree! I really recommend reading these two tutorials too: how to make Christmas stars and how to make hanging hearts.


WRITE A COMMENT