
The journey into faux leather accessories dedicated to crafters (with a bit more particular attention to knitters) continues. This piece is straight forward to make too but with impressive results.
A maxi envelope! Whats it for though? All those small and flat tools that come in handy when youre working on your project, like a crochet hook, a knitting needle gauge, locking stitch markers, sewing curved needles, interchangeable knitting cables and patterns.
Also in this case and in my opinion why this mini collection is a cut above the rest is because this accessory has been created with knitters or embroiders in mind but it can be used in other ways too. Wouldnt it be gorgeous as a clutch bag too?
So lets follow Manuel Attardis instructions on how to make a maxi envelope step by step.
MATERIALS
Deluxe Faux Leather col. Chamomile 50cm
Sewing machine
Fabric scissors
Coloured thread
Fabric glue
Embroidery scissors
Pattern notcher
A press stud
Pencil
Set square
METHOD
Were going to start by drawing a large cross, at a perpendicular axis which is where well create the pattern of our maxi envelope.

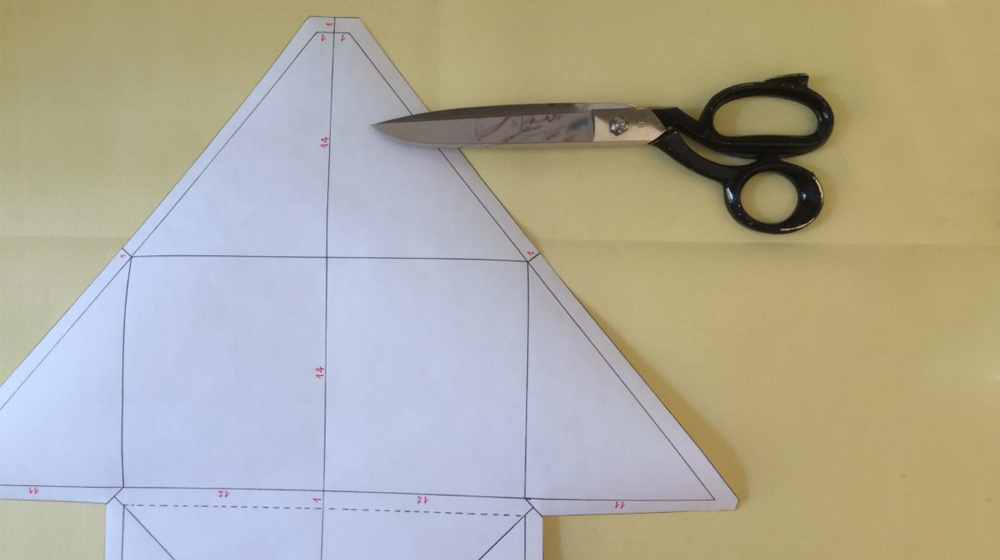
Create the pattern as in the photo below, paying close attention to the measurements.
The outcome will look like a sort of arrow, where the base of the rectangle will be 13cm high and 24cm long and the triangle above will have a 46cm base and 28cm high. Careful that the triangle doesnt have a pointy end, it should be blunt and 2cm long. Lastly, add a 1cm seam all the way around and the notches as marked.

After cutting the pattern out, go ahead and create the notches with the pattern notcher.

Draw the model on the back of our Deluxe Faux Leather and cut it out.

Once youve cut it out, sew the seam by folding the tip of the arrow and the sides onto themselves so they meet in the centre, sewing them 1 cm in.

Now fold the two ends of the base of the arrow sewing a 1cm seam.

Our envelope is almost ready, but first we have to glue all the seams with a layer of fabric glue, on both the sides we want to glue down.

By flattening both sides of the seams well, we can glue them open.

Turn the envelope over and sew the last horizontal seam to hold the flap.
Then attach a press stud manually with a needle and thread and

...our Maxi envelope is done!

You like?
Last but not least in this faux leather accessories collection dedicated to crafters is a really amazing apron. Find it here.


WRITE A COMMENT