
Plume Yarn, I can't deny having fallen in love with it at first sight. In these past few months I have been churning out one project after the other and believe me, in the end it was hard to present you "only" 3.

So, after the maxiscarf/bib and the animal-friendly fur poncho, here I am with presenting you a new piece, the last one - for now!
When making this coat, I was inspired by a period in the history of that fashion I love, the fabulous 60's and 70's, making free use of the hippie style, although in a deluxe, oversize version. In fact, crocheted coats, so feminine and versatile, are definitely among this season's favorites!
Again, a fashionable yet practical and comfortable outfit. An item with a vintage soul, that you can personalize to make your coat, and to make you feel at the center of the attention at any occasion.
A traditional knitting technique and a classic yarn such as Plume create such a trendy item!
Follow me step by step to create your coat!
You will start by creating the back of your coat. Start a crochet chain and work in the basic crochet stitch, following the size of the outline.
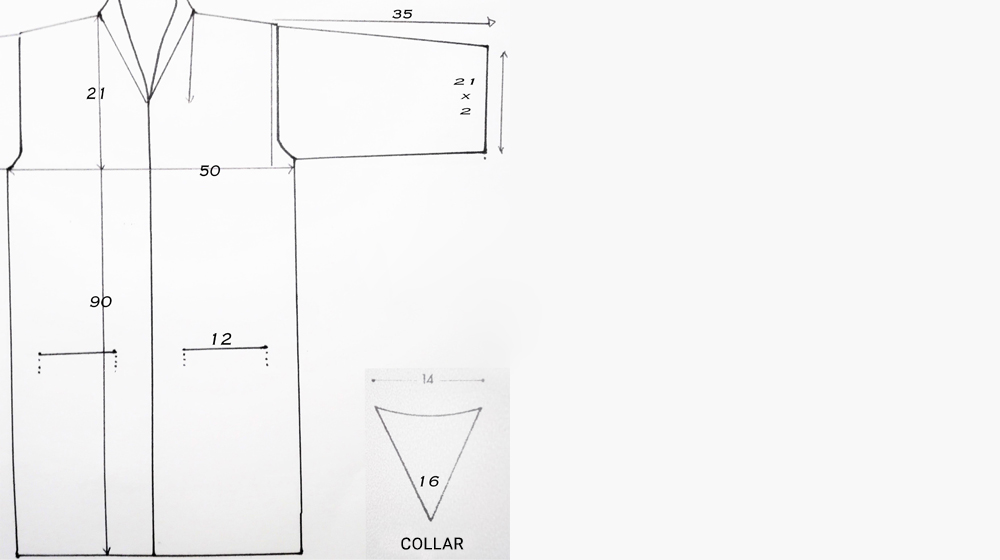
For the armhole, decrease two stitches on each end.
At this point, you can begin crocheting the front. Follow the same pattern as for the back but in half the width.
To create the openings for the pockets, take a look at this video.
Once you have created the pocket openings, you can move on to creating the pockets. Once more, I will show you how with this video. A picture is worth a thousand words.
At this point, all that's left to do is create the sleeves by creating a straight rectangle for each sleeve.
Now that you have all of the pieces, assemble them.
Finally, pick up all of the stitches around the collar and crochet a collar about 12-14cm long.
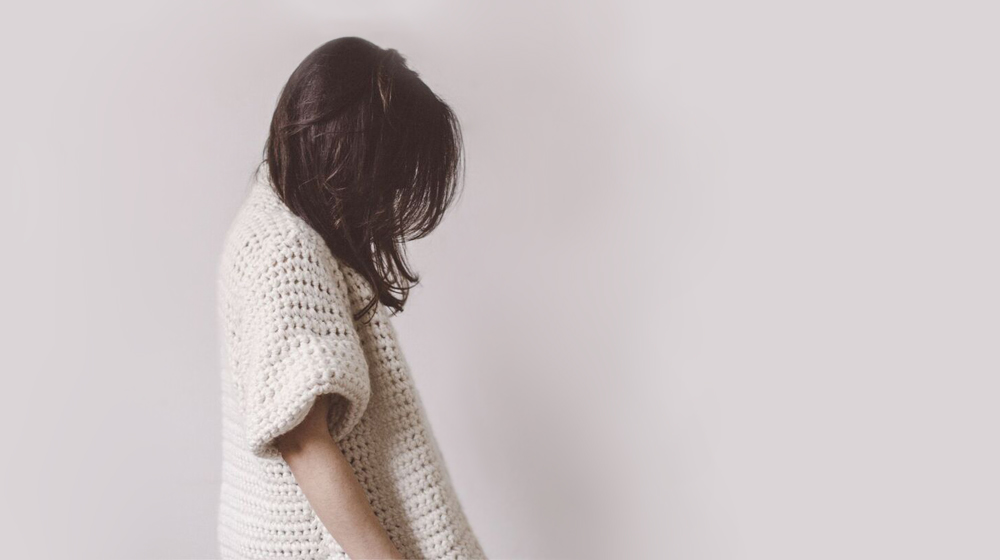
Here is the finished piece!
Here I am with a few suggestions:
See you soon!!
Cris
VeryCris/Cristina Pedrotti FashionBlogNotes
VideoMaker e Photo Agnese Morganti/lemissmatch
If you liked this tutorial, you might also like our Poncho tutorial!
WRITE A COMMENT