
While I was preparing my "Origami Felt" workshop, I experimented with DHG prefelt for the first time.

It immediately looked different from the other prefelts around and that I know well. Indeed, it wasn't particularly "woolly", which gave me the impression of a more processed and stable felt. In fact, you cannot stretch it too much, or divide it into layers. Since I usually work with graphic design patterns that I cut out from prefelts that I make entirely by hand, I have always been looking for an industrial prefelt that could replace the one I make myself, to speed up my work. That is why I was attracted to DHG Prefelt.
So, I immediately started experimenting, making different samples so that I could understand how this DHG product would behave during felting. I created some 30x30 cm squares, using both this felt and other types readily available from other sellers. I worked with them, following the same process for each piece, and rolling evenly from each side. I found out that the DHG prefelt:

Based on my experience, all kinds of industrial prefelt show some slight differences between how they felt vertically and how they shrink horizontally. DHG prefelt is no exception, but it is a very small difference 4-5% more horizontally than vertically). So, especially if one is working with small shapes, the difference is almost imperceptible. Because of this, when I used it for some of my jewels with the FeltFolding technique, the results were extremely satisfying.
If, however, you want to make bigger shapes or patterns, I recommend to do as follows: since DHG prefelt is more felted horizontally (because the needles worked in that direction), you are going to have to wet felt it vertically, until both sides are the same length. At this point, let it dry and cut out the shapes as desired.
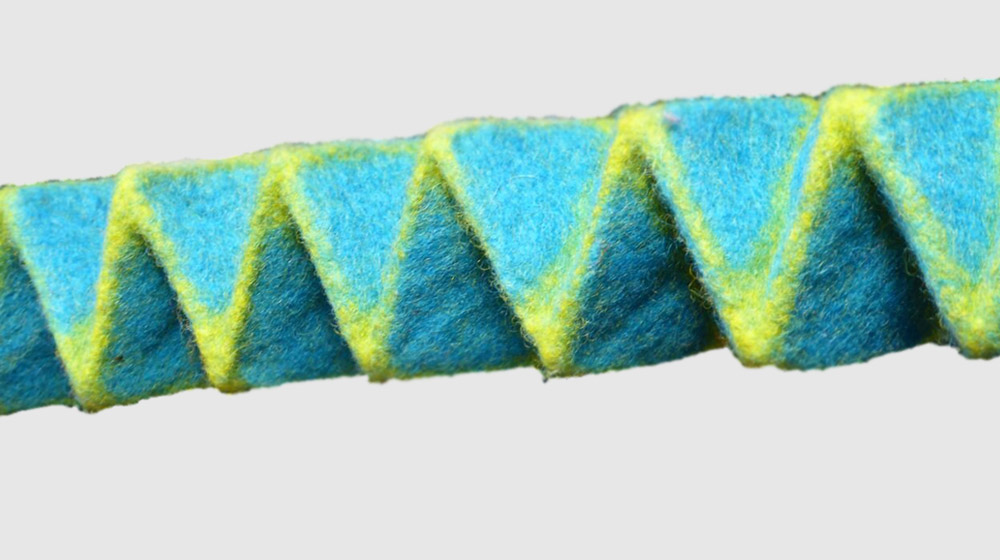
If you want to stress the graphic effects of you work, I recommend you play around with contrasting colors a little bit. This is something I really love to do, as well as creating new effects, taking advantage of the different degrees of penetration of fibers in the different layers, as you can see in the pictures below.


Instead, if you wish to avoid this type of result, all you need to do is felt the prefelt by 5-10% more, so as to block the fibers, before you cut out the shapes to apply to the chosen base. Don't forget!
Then, I tried my hand at inlay work. The most complex aspect of making inlay work with felt, by placing a cut-out shape on top of a second piece of prefelt serving as base, is that once you are finished the two layers must be tightly joined but at the same time there has to be a sharp contrast between the pattern and the background, with very sharp outlines.
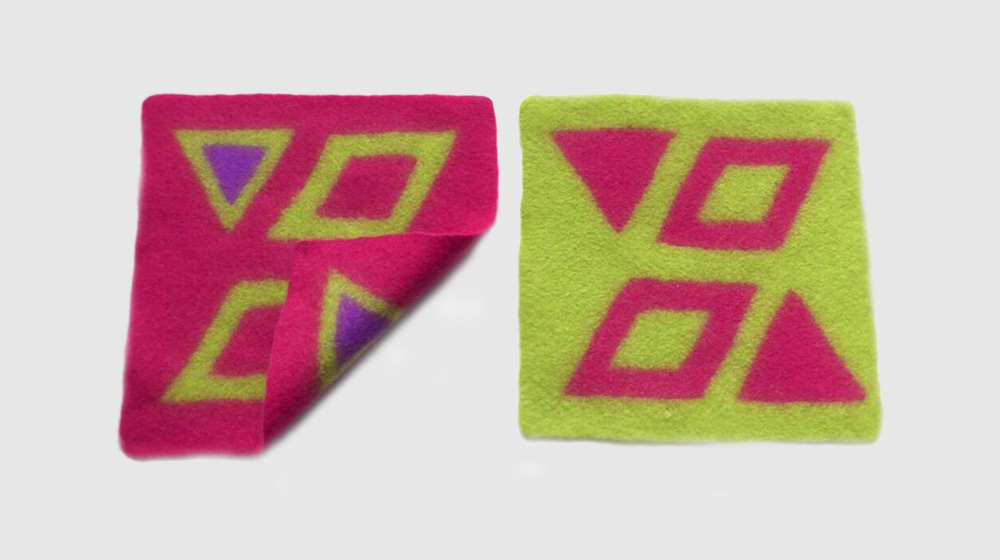
If the prefelt used for the inlay has been previously processed, the outlines are going to be sharp but the two layers may not attach to each other well enough. On the other hand, if you cut out prefelt that has been felted very little or not at all, there is a risk that you are going to end up with two tightly joined layers but with undefined lines and edges.
As you can see by looking at both of the pieces I made, DHG Prefelt lets you felt both layers perfectly while keeping the pattern outlines very sharp.


For an even cleaner result, you can finish it off with a razor.
After all of my experiments, I can definitely say that DHG prefelt is an excellent material, especially for making shapes and graphic patterns. I like the range of colors available, and by blending prefelt fibers in different layers and colors, you can also create a lot of alternative shades. The Extra Fine Merino Wool that I used guarantees that the final result will have a wonderful hand and very soft surfaces that I imagine would be ideal also for clothing projects.
What do you think? Did this make you want to experiment?
If you liked this article, you may also be interested in reading the one about our Mulberry Silk Laps.


WRITE A COMMENT