
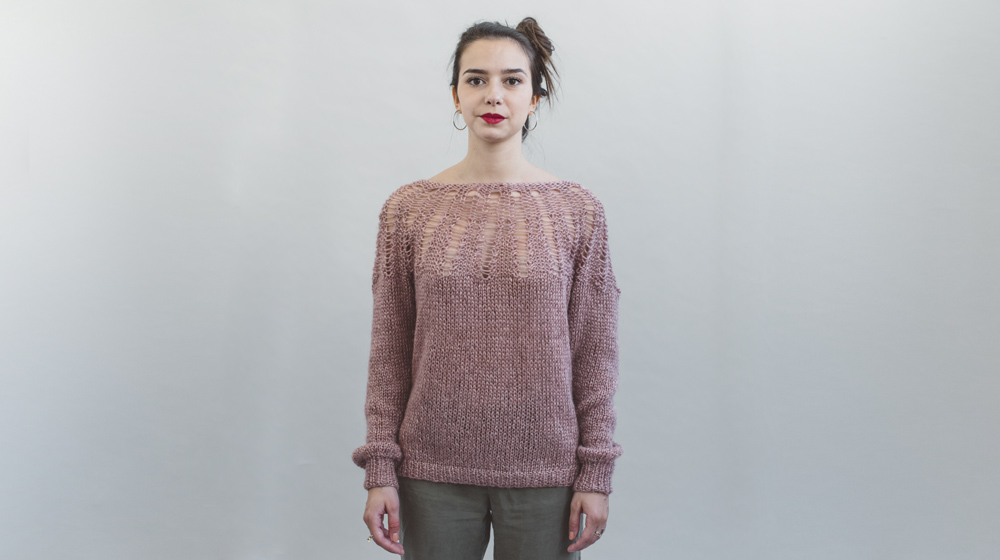
Here we are at the second tutorial featuring our Hokusai, a bright and super soft yarn made from Alpaca, Wool and Viscose. Its 2.200 thread count makes it a fine yarn suitable for making light as a feather garments. The knitting project weve chosen, or rather, an openwork yoke sweater, is pretty much suitable for everyone. The difficulty level is quite low but the end result is absolutely amazing!
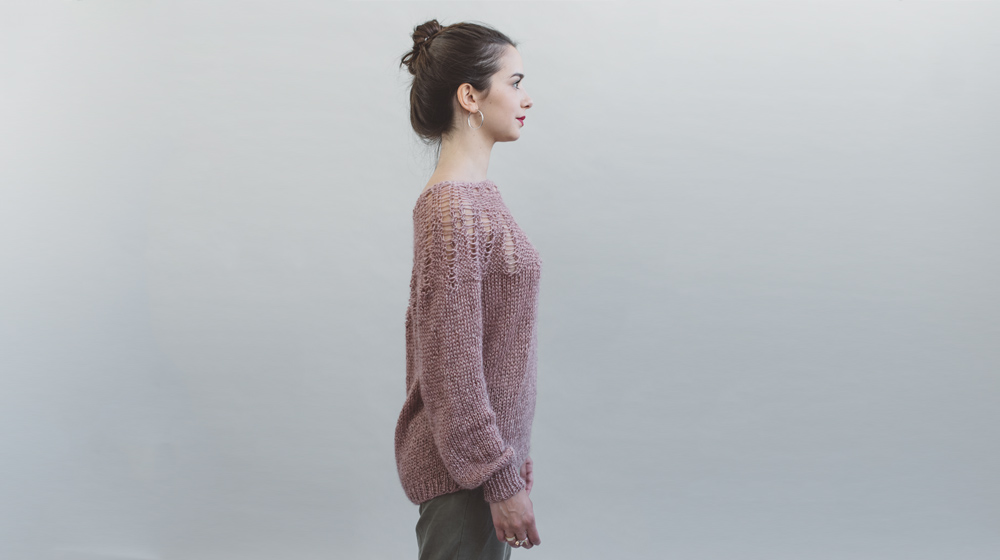
To make this sweater weve used two of the best known stitches, otherwise known as the rib stitch and the stockinette stitch. The main characteristic about this sweater is the openwork yolk that gives the garment a delicate and fluffy look, which combined with two rather high cuffs make it stand out even more.
Instead, if youd like to have a go at the tubular stitch, then we suggest reading the tutorial on how to make a puff sleeve sweater, where Hokusai is once again, the star of the show.
So, lets grab our needles and yarn and get started on this tutorial on how to make our openwork yoke sweater, great for both autumn and spring.

MATERIALS
Hokusai yarn col. Lace 280 g / 9.9 oz
Knitting needle n° 5.5 EU / US 8
Knitting needle n° 8 EU / US 11
Knitting needle n° 8 EU / US 11 - 60 cm long
3 stitch markers in the same colour and 1 in a different colour
A sewing needle
KNIT-CROCHET STITCHES USED
Rib stitch 1X1:
row 1: knit 1 purl 1;
row 2: work the stitches as they appear.
Stockinette stitch:
knit 1 row purl 1 row.
SIZE
M
METHOD
The BACK and FRONT
Cast on 68 stitches using the n° 8 needles (US11) rib stitch 1 x 1 using n° 5.5 needles (US 8) for 9 rows.
Continue working the stockinette stitch with n° 8 needles increasing a stitch on each side every 10 rows, until youve got 72 stitches.
Continue working the stockinette stitch without increasing until 50 rows.
Leave it hanging.
SLEEVE
Cast on 28 stitches with n° 8 needles (US 11) and work the rib stitch 1 x 1 with n° 5.5 needles (US 8) for 18 rows.
Row 19: using n° 8 needles (US 11) work * knit 1, 1 increase* repeat from*to* for all the row so youve got 40 stitches.
Continue working the stockinette stitch, increasing 1 on each side every 6 rows until youve got 58 stitches and 60 rows.
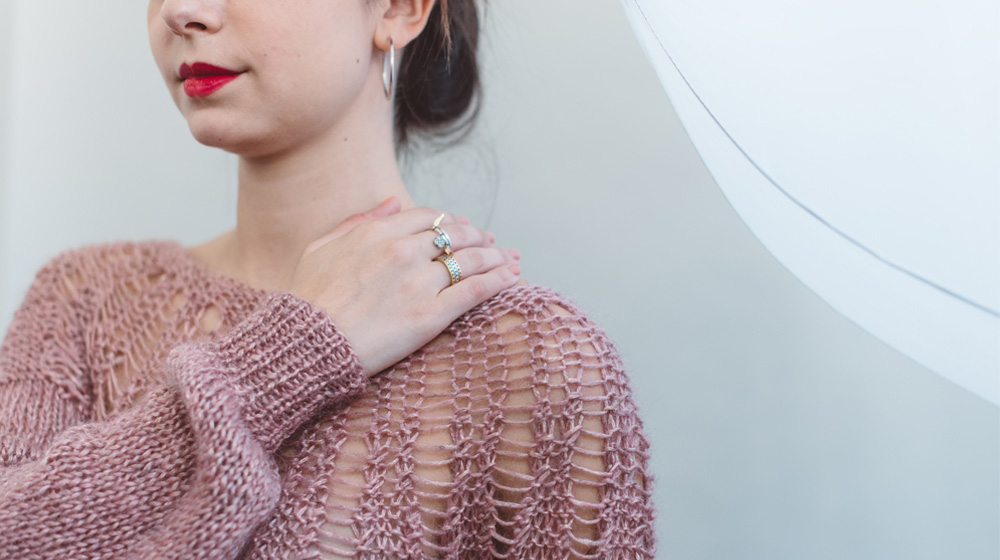
Now lets see to the openwork yoke part which is going to bring lightness and puffiness to our sweater.

With the circular needles n° 8 ( US 11) start the yoke.
First put the front then a sleeve, the back and the other sleeve onto the needles, well have a total of 260 stitches.
Youre going to need 4 stitch markers, 3 in colour A and one in colour B that will indicate the start of the round.
Work the yoke as follows:
round 1: knit 1, knit 2 together, knit 67, knit 2 together, knit 1. Place the colour A stitch marker.
Knit 1, knit 2 together,knit 52, knit 2 together, knit 52, knit 2 together, knit 1. Place the colour A stitch marker.
Knit 1, knit 2 together, knit 67, knit 2 together, knit 1. Place the colour A stitch marker.
Knit 1, knit 2 together, knit 52, knit 2 together, knit 1. Place the colour B stitch marker.
KEEP WORKING IN THE ROUND
Round 2: knit 1, knit 2 together, knit 65, knit 2 together, knit 1. Place the colour A stitch marker.
Knit 1, knit 2 together, knit 50, knit 2 together, knit 1. Position the colour A stitch marker.
Knit 1, knit 2 together, knit 65, knit 2 together, knit 1. Place the colour A stitch marker.
Knit 1, knit 2 together, knit 50 stitches, knit 2 together, knit 1. Place the colour B stitch marker.
Round 3: knit 1, knit 2 together, knit 63, knit 2 together, knit 1. Place the colour A stitch marker.
Knit 1, knit 2 together, knit 48, knit 2 together, knit 1. Place the colour A stitch marker.
Knit 1, knit 2 together, knit 63, knit 2 together, knit 1. Place the colour A stitch marker.
Knit 1, knit 2 together, knit 48, knit 2 together, knit 1. Place the colour B stitch marker.

Round 4: knit 1, knit 2 together, knit 61, knit 2 together, knit 1. Place the colour A stitch marker.
Knit 1, knit 2 together, knit 46, knit 2 together, knit 1. Place the colour A stitch marker.
Knit 1, knit 2 together, knit 61, knit 2 together, knit 1. Place the colour A stitch marker.
Knit 1, knit 2 together, knit 46, knit 2 together, knit 1. Place the colour B stitch marker.
Youll now have 230 stitches in total.
Turn over the work and continue working on the back as follows:
*From this moment on we have to bind off the first two stitches in order to block the thread. Its enough every 2 rounds*
round 1: knit 2 together, knit 6, knit 2 together, 1 yarn over the needle.
Repeat for the whole round.
round 2: knit 8 drop the yarn over, 1 yarn over on the needle. Repeat for the whole round.
round 3: work the stitches as they appear but bind off the first 2 and last 2 stitches of the 8 knit stitches. See from * to * (necessary to block the thread).
round 4: as the 2nd round.
round 5: knit 2 together, knit 4, knit 2 together, drop the yarn over, 1 yarn over on the needle. Repeat for the whole round.
round 6: work the stitches as they appear and drop the yarn over, 1 yarn over on the needle. Repeat for the whole round.
round 7: repeat the previous round
round 8: repeat the previous round
round 9: repeat the previous round
round 10: knit 2 together, knit 2, knit 2 together, drop the yarn over, 1 yarn over on the needle. Repeat for the whole round.
round 11: repeat the previous round
round 12: repeat the previous round
round 13: repeat the previous round
round 14: repeat the previous round
round 15: knit 2 together, knit 2 together, drop the yarn over, 1 yarn over on the needle.
Repeat for the whole round.
From now on we dont have to bind off the stitches anymore, work the other 7 rounds as they appear, always yarning over though.
Round 16: work the stitches as they appear
round 17: work the stitches as they appear
round 18: work the stitches as they appear
round 19: work the stitches as they appear
round 20: work the stitches as they appear
round 21: work the stitches as they appear
round 22: knit the stitches including the yarn overs.
Knit stitch another 3 rounds and bind off.
Lastly, sew together the front and the back, after take the sleeves and sew them onto the body.

Weve now come to the end of our tutorial on how to make an openwork yoke sweater. Weve used Hokusai yarn, a mix of Wool, Alpaca and Viscose to achieve this soft and fluffy sweater. If youre up for seeing more free patterns, why not take a look at Alpaca Yarns made in DHG.


WRITE A COMMENT